A helpdesk agent built with Copilot Studio can do more than answer common IT questions. It can collect issue details from an employee, confirm the request, and submit a ticket directly into a SharePoint issue tracker list using Power Automate.
This is a good starter use case because it is simple, useful, and easy for IT teams to improve over time. The agent handles the conversation, Power Automate handles the submission, and SharePoint becomes the ticket-tracking system.
What you are building
The final setup looks like this:
| Component | Role |
|---|---|
| Copilot Studio | Creates the helpdesk agent and asks the user for issue details |
| Power Automate | Receives the details from the agent and creates a SharePoint list item |
| SharePoint issue tracker list | Stores the submitted helpdesk tickets |
| Optional Teams or SharePoint channel | Lets employees access the agent where they already work |
Copilot Studio supports agent flows that automate tasks and integrate apps and services, and those flows can be called from an agent or topic as a tool. Microsoft also notes that agent flows can use connectors, conditions, loops, data operations, and other actions to run business processes behind an agent conversation.
Before you start
You need access to:
- Copilot Studio
- Power Automate
- SharePoint in Microsoft 365 or Microsoft Lists
- Permission to create or edit a SharePoint list
- Permission to create flows and use SharePoint connectors
If you plan to publish the agent in SharePoint, Microsoft says the agent must be published first, and the maker needs write access to the SharePoint site used for deployment (Microsoft Learn).
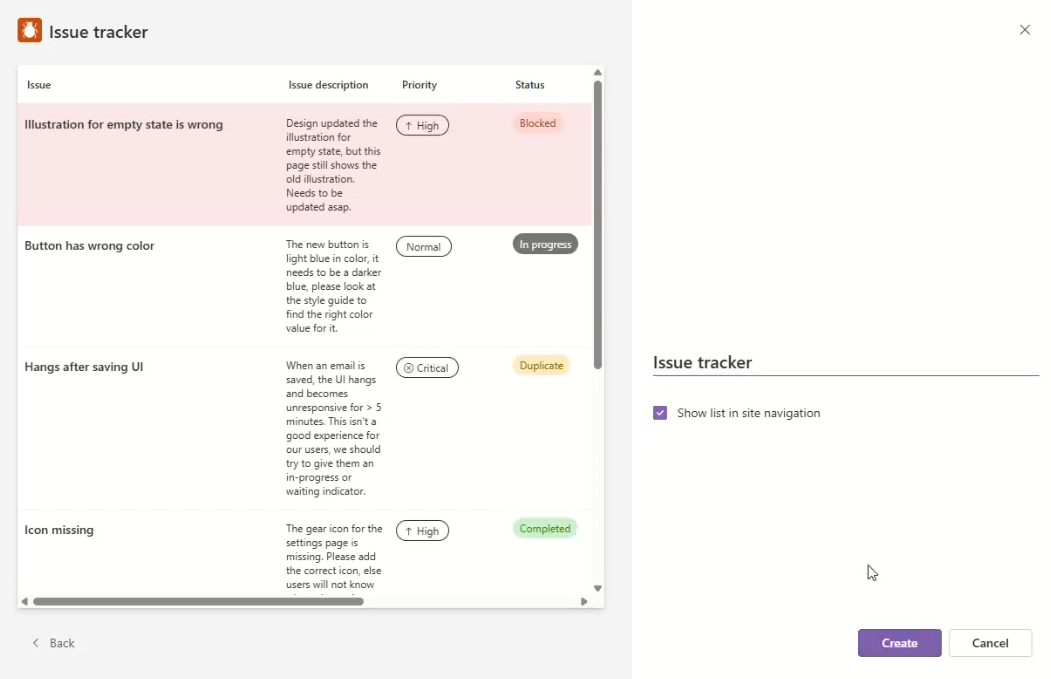
Step one: Create the SharePoint issue tracker list
Start with the ticket destination. In SharePoint, create a list that will store every request submitted by the agent.
Go to your SharePoint site, select New > List, choose the Issue tracker template if it is available, and select Use template. Microsoft says lists can be created from Microsoft Lists, Teams, or SharePoint using a template, Excel file, or a blank list.
Recommended columns:
| Column | Type | Example |
|---|---|---|
| Title | Single line of text | Laptop VPN not connecting |
| Description | Multiple lines of text | User cannot connect to VPN from home |
| Category | Choice | Hardware, Software, Access, Network |
| Priority | Choice | Low, Medium, High, Critical |
| Requested By | Person or text | Alex Johnson |
| Single line of text | alex@company.com | |
| Status | Choice | New, In progress, Resolved |
| Submitted Date | Date and time | Auto-filled by flow |
Keep the list simple at first. You can always add assignment, SLA, department, location, device type, or escalation fields later.
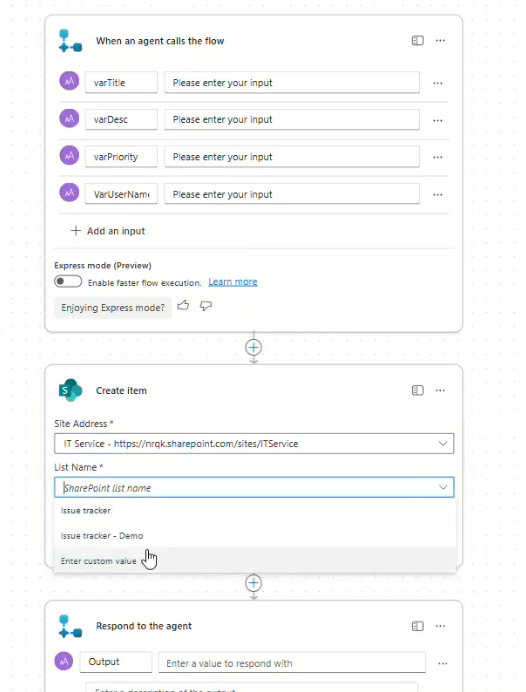
Step two: Build the Power Automate flow
Next, create the flow that receives ticket details from Copilot Studio and creates an item in the SharePoint list.
In Power Automate, create a cloud flow that can be called by the agent. The flow should accept input values such as title, description, category, priority, requester name, and email. Then add the SharePoint Create item action and map each input to the matching SharePoint column.
Microsoft says Power Automate can automate common tasks across SharePoint, Microsoft Lists, OneDrive for work or school, Microsoft 365 services, and third-party services. From a SharePoint list, users can also start from Integrate > Power Automate > Create a flow, then complete and save the flow in Power Automate.
Suggested flow structure:
- Trigger: Called from Copilot Studio or an agent flow.
- Inputs: Ticket title, description, category, priority, requester name, and email.
- Action: SharePoint Create item.
- Output: Ticket ID or confirmation message.
The output is important. Send a clear response back to the agent, such as: “Ticket submitted successfully. Your ticket number is HD-1042.”
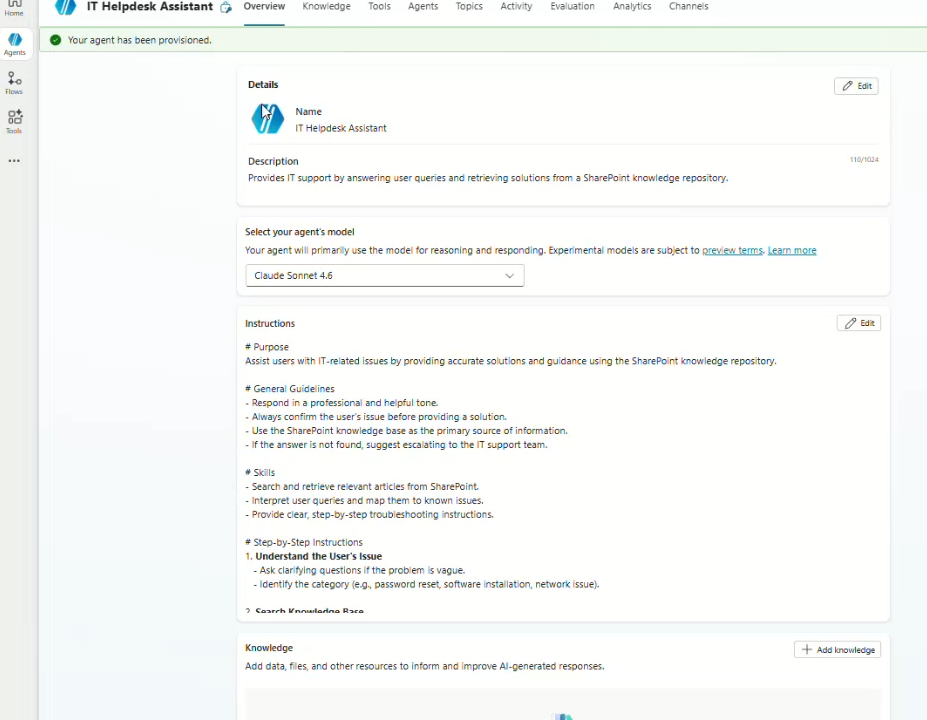
Step three: Create the Copilot Studio helpdesk agent
In Copilot Studio, create a new agent and give it a clear purpose. For example:
“You are an internal IT helpdesk agent. Help employees report IT issues. Ask only for the information needed to create a support ticket. Confirm the details before submitting.”
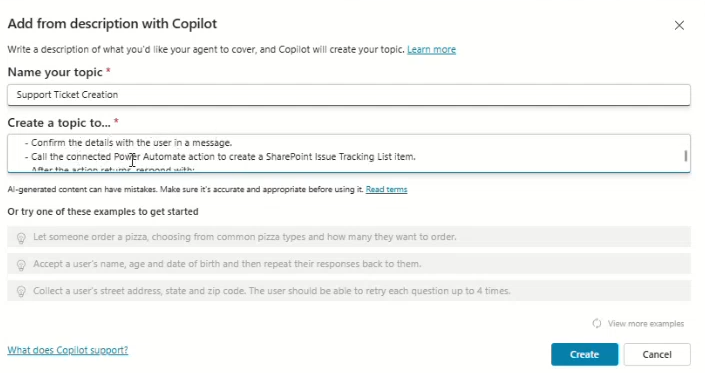
Create a topic such as Submit a Helpdesk Ticket. Add trigger phrases like:
- I need IT help
- Submit a ticket
- My laptop is not working
- Report an issue
- I can’t access an app
Then design the conversation. Ask for:
- What is the issue?
- Which category best fits the issue?
- How urgent is it?
- What is your name and email?
- Do you want me to submit this ticket?
Do not ask ten questions up front. A helpdesk bot feels better when it asks the minimum information needed and uses plain language.
Step four: Connect the agent to the flow
After the conversation collects the required details, call the Power Automate flow or agent flow from Copilot Studio.
Map the agent variables to the flow inputs:
| Agent variable | Flow input | SharePoint column |
|---|---|---|
varIssueTitle | Title | Title |
varIssueDescription | Description | Description |
varCategory | Category | Category |
varPriority | Priority | Priority |
varRequesterName | RequestedBy | Requested By |
varRequesterEmail |
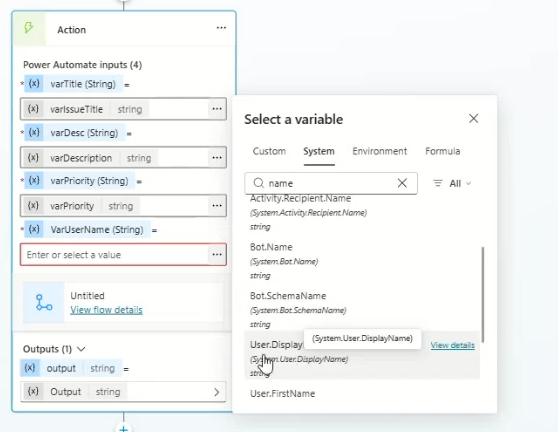
Copilot Studio can pass variables between an agent and a flow, and Microsoft documents this as part of using input and output variables with agent flows. Agent flows can be created in Copilot Studio using natural language or the designer, and they can also be converted from existing Power Automate cloud flows when the environment and capacity requirements are met.
Once the flow runs, show the returned ticket number or confirmation message to the user.
Example response:
“Your ticket has been submitted. Ticket ID: HD-1042. The helpdesk team will review it and follow up based on priority.”
Step five: Test the full ticket submission
Test the agent with common helpdesk scenarios:
- Password reset request
- VPN issue
- Laptop not turning on
- Microsoft Teams audio problem
- Access request for a shared folder
Check that each ticket appears in the SharePoint issue tracker list with the correct fields. Also test incomplete inputs, vague descriptions, and users changing their mind before submission.
Before promoting the agent to employees, test it from both Copilot Studio and the final channel where users will access it. Microsoft recommends testing a SharePoint-deployed agent in both Copilot Studio and Copilot chat in SharePoint before making it broadly available.
Step six: Publish the agent
Once testing looks good, publish the agent to the channel your employees use most. SharePoint is a natural choice if the helpdesk lives on an intranet site. Teams is often better if employees already ask for help there.
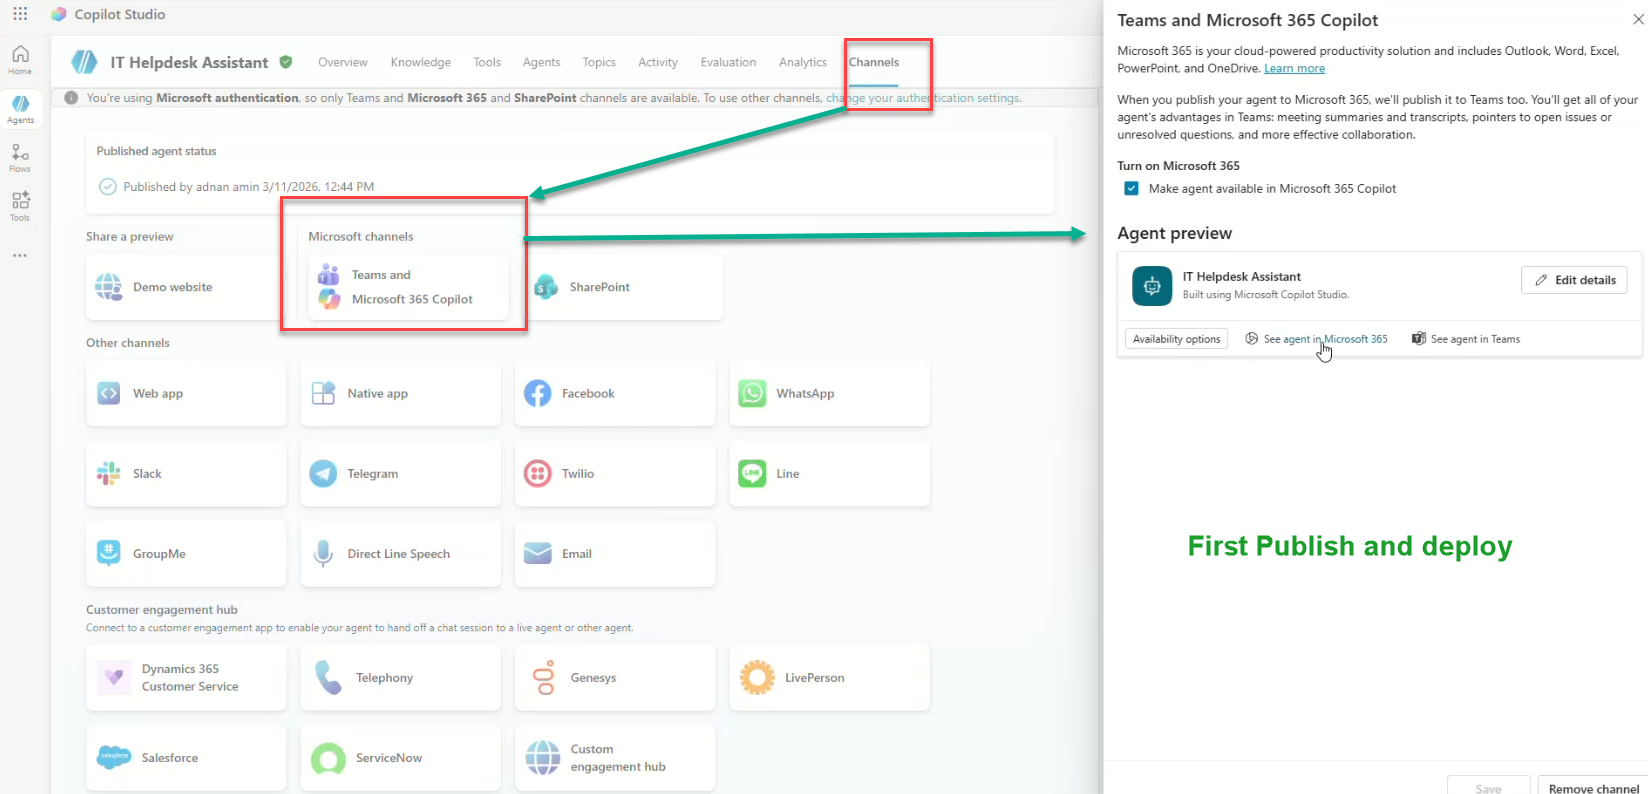
For SharePoint deployment, Microsoft says you can go to the agent’s Channels page, select the SharePoint tile, choose or enter the SharePoint site, and deploy the agent.
Best practices
- Confirm before submit: Show the issue summary and ask the user to confirm before creating the ticket.
- Keep categories simple: Too many ticket categories will confuse users.
- Return a ticket ID: Users trust the process more when they get a reference number.
- Use default status: Set new tickets to “New” automatically in SharePoint.
- Add notifications later: After the first version works, add email or Teams alerts for high-priority tickets.
- Review permissions: Make sure the flow connection can create list items, but do not give unnecessary access.
Building a helpdesk agent with Copilot Studio, Power Automate, and SharePoint is a practical way to automate internal support intake without building a custom app. Copilot Studio manages the conversation, Power Automate creates the ticket, and SharePoint gives the IT team a familiar place to track issues.
Start with a small version: collect the issue, category, priority, name, and email. Once that works reliably, add routing, notifications, approvals, SLAs, and reporting.
Agent
copilot studio
Custom Agents
Helpdesk
Microsoft 365
Microsoft 365 Copilot
Power Automate
SharePoint
SharePoint Online
Adnan, a distinguished professional, boasts an impressive track record as a Microsoft MVP, having achieved this prestigious recognition for the eighth consecutive year since 2015. With an extensive career spanning over 18 years, Adnan has honed his expertise in various domains, notably excelling in SharePoint, Microsoft 365, Microsoft Teams, the .Net Platform, and Microsoft BI. Presently, he holds the esteemed position of Senior Microsoft Consultant at Olive + Goose.Notably, Adnan served as the MCT Regional Lead for the Pakistan Chapter from 2012 to 2017, showcasing his leadership and commitment to fostering growth within the tech community. His journey in the realm of SharePoint spans 14 years, during which he has undertaken diverse projects involving both intranet and internet solutions for both private and government sectors. His impact has transcended geographical boundaries, leaving a mark on projects in the United States and the Gulf region, often collaborating with Fortune 500 companies.Beyond his roles, Adnan is a dedicated educator, sharing his insights and knowledge as a trainer. He also passionately advocates for technology, frequently engaging with the community through speaking engagements in various forums. His multifaceted contributions exemplify his dedication to the tech field and his role in driving its evolution.


No Comments